Saturday, September 3, 2016

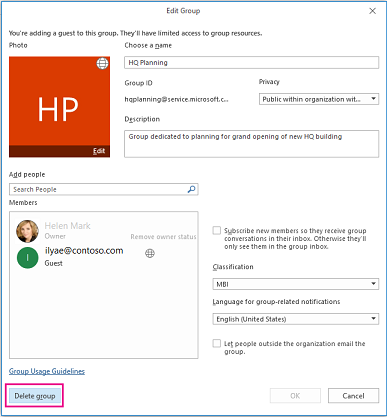
Delete a group


Leave or unsubscribe from a group


When you leave a group, you give up your access to the group inbox, calendar, OneNote notebook, and library. The only way to regain access is to rejoin the group.
When you unsubscribe from a group, you are still a member but no longer receive messages and calendar event notifications in your personal inbox. You'll have to go to the group inbox to see them.


Leave or Unsubscribe from a Group in Outlook on Web(formerly Outlook Web App)

  1. Open Outlook on the web.
  2. In the navigation pane, under Groups, select your group.
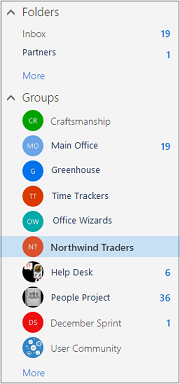
    Left nav from Outlook in Office 365
  3. In the group header, select Joined. Then select:
    • Unsubscribe from email for this group. You'll no longer receive email or calendar notifications in your inbox, except in these two cases:
      • When someone replies to a message that was sent to the group by an unsubscribed user, the unsubscribed user receives those messages in his or her inbox.
      • When someone replies to a message that was replied to by the unsubscribed user, the unsubscribed user receives those messages in his or her inbox.
      Everything is still in the group mailbox, however, so you can browse messages from there.
    • Leave group. You'll no longer be a part of the group and won't be able to access the files or other data.
      Unsubscribe or leave options for groups in Outlook on the web


Leave a Group in Outlook on the Web(Guests Only)

As a guest, you receive all group conversations in your inbox; you don't have a group mailbox in your email client. In every email conversation you'll see a message with a link to leave the group.
Message presented to guests in each mail received from the group
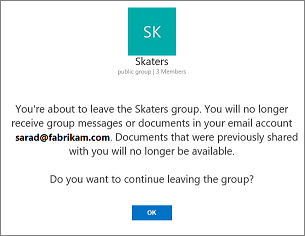
Click the link to leave the group. You'll receive a message asking you to confirm that you want to leave.
Confirmation message about leaving the group
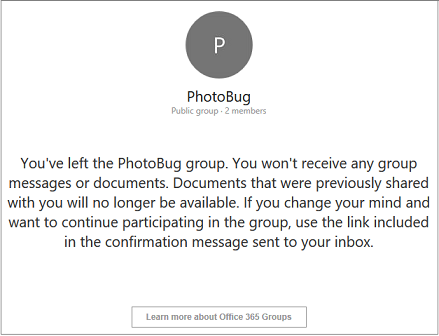
Once you confirm, you'll receive an email that includes a link to rejoin. Clicking the link will send a request to the group owner.
Message displayed when a guest leaves a group


Leave or Unsubscribe from a Group in Outlook 2016

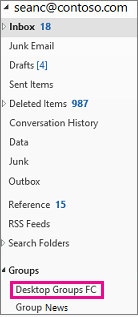
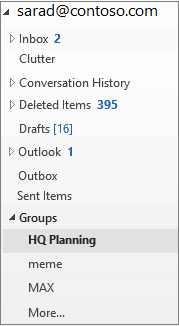
  1. Select a group that you're a member of in the left nav bar.
    Select a group on the left Nav
  2. Choose Membership on the ribbon. Then select:
    • Unsubscribe    You'll still be a part of the group, but won't receive any conversations or invitations in your inbox, except in these two cases:
      • When someone replies to a message that was sent to the group by an unsubscribed user, the unsubscribed user receives those messages in his or her inbox.
      • When someone replies to a message that was replied to by the unsubscribed user, the unsubscribed user receives those messages in his or her inbox.
    • Leave    You'll no longer be a part of the group and won't be able to access the files or other data.
      Leave a group

Share group files in Outlook 2016

The majority of shared files for your groups are stored in a dedicated document library on OneDrive for Business, but you can also access additional shared and followed documents that you may need to further collaborate with your group.
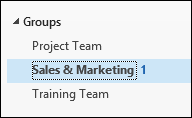
  1. Select a group on the left nav bar.
    Groups on the left Nav bar
  2. Select Files on the ribbon.
    Group Files in Outlook
    You'll be directed to OneDrive for Business where you can create and upload files as well as manage the documents.
Any files and folders added to you group's OneDrive for Business library are automatically shared with all the members of the group. By default, group members have view/edit access to the files, while everyone else in your organization has view access.

Schedule a meeting on a group calendar in Outlook 2016

A group calendar is a shared calendar where you and every member of your group can schedule and see upcoming events. You can also share the events with other groups in your school or workplace.
The benefit of creating events on a group calendar is that everyone who's a member of the group can edit the events. Why is that cool? Because if you're sick or decide to take a vacation day and forget to cancel the meeting, anyone else in the group can cancel it for you. No more marooned meetings!

Join versus subscribe

It's important to understand the difference between joining a group and subscribing to it because the difference affects your group calendar.
When someone creates a group, they have the option to subscribe all new members automatically. If they choose not to subscribe members automatically, the members will be joined to the group but won't receive conversations or calendar events in their private inbox. These items will only appear in the group mailbox.
A subscribed member receives conversations and calendar events in both their private inbox and the group inbox. The benefit of this is that you don't have to be in a group to see group emails and calendar invitations. Also, you can open and reply to them from either location. If you aren't subscribed to a group but want to be, see Subscribe to a group for instructions.

Schedule a meeting on a group calendar

  1. In Outlook 2016, choose a group from the left nav.
    Groups on the left Nav bar
  2. On the ribbon, select Calendar.
    Select calendar
  3. Select New Skype Meeting or New Meeting. If you make this a Skype meeting, call details will be added to the message body. 
    New meeting
  4. You'll notice the group's alias is entered automatically in the To line. Enter a subject, location, and start and end time for your meeting.
  5. In the meeting area, type an agenda. If you're setting up a Skype Meeting, be careful not to change any of the online meeting information.
  6. Select Scheduling Assistant on the ribbon to make sure you have the best time for the meeting.
  7. Select Send.
The meeting appears on the group's calendar, as well as the personal calendar of each subscribed each member.

Start a group conversation in Outlook 2016

Group conversations are stored in the group's mailbox, separated from individual members' mailboxes. The messages in the group inbox are displayed in a list view, which includes members' photos to visually show the contributors to the conversation.
You can start a new conversation with the group members or reply inline to a message. Conversation details are displayed in the reading pane, organized from oldest to newest messages for easy reading.

Create a new conversation

  1. Choose a group on the left nav side.
    Groups on the left Nav bar
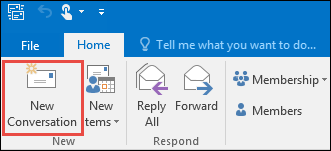
  2. Select New Conversation on the upper left corner of the ribbon.
    New Group conversation
    Notice the group's alias is automatically added in the To line.
  3. Type your message and select Send. All the members of the group will receive your email.
TIP:  You can also send an email to a group from your main Outlook Inbox, just like using a distribution list. Just add the group's alias in the Toline in your email.

Reply to an existing message

  1. To reply only to the sender, right-click a message and select Reply.
    Your messages is sent only to that person, and not the group.
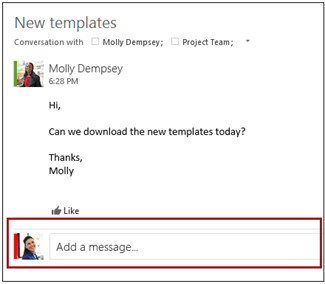
  2. To reply to the group, either right-click the message and choose Reply all, or type in the Add a message box in the reading pane and select Send.
    Add a message

Create a task from a message

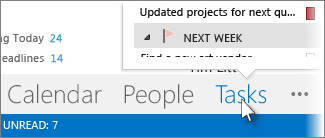
When you want to create a task based on the contents of an email message, you don’t have to re-enter all the information. Instead, click the message and drag it to Tasks on the navigation bar.
The contents of the message, except attachments, are copied to the body of a new task. A task created this way is the same as if you create a task from scratch, except you save time as contents from the message are automatically added to the new task. Just like for any task, you can set a due date, add a reminder, or assign the task to someone else.
TIP:  You can also drag contacts, calendar items, and notes to the Navigation Bar to create tasks.

Creating a task from a message versus flagging the message

When you flag an email message, the message appears in the To-Do List in Tasks and on the Tasks peek. However, if you delete the message, it also disappears from the To-Do List in Tasks and on the Tasks peek. Flagging a message doesn’t create a separate task.
By creating a task from a message as described above, the new separate task is independent of the message. If the original message is deleted, the task is still available, including the copied contents of the message.

Track tasks you’ve assigned to someone else

You can review task progress for tasks you assigned to someone else.
  1. On the navigation bar, click Tasks.
  2. Click View > Change View > Assigned.
Assigned task view command on the ribbon

Assigned tasks are missing

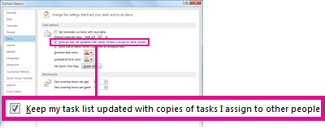
If you’re not seeing tasks you’ve assigned, Outlook might not be set up to keep copies of tasks you assign.
  1. Click File > Options > Tasks.
  2. Under Task options, check the Keep my task list updated with copies of tasks I assign to other people box.
Keep my task list updated with copies of tasks I assign to other people check box
Turning on this option doesn’t track the tasks you’ve already assigned, but it will track any new ones you assign.

Assign a task

Tasks help track things you need to do. You can assign tasks to other people as well.
  1. On the navigation bar, click Tasks, and then click New Task, or open an existing task.
    Keyboard shortcut To create a task, press Ctrl+Shift+K.
  2. Click Assign Task.
    Assign task command on the ribbon
  3. In the To box, enter a name or an email address.
  4. Enter SubjectStart date, and Due date.
    Start and Due Dates properties for an assigned task
  5. If you want the task to repeat, click Recurrence, select the options you want, and then click OK.
  6. Click Send.
    NOTE:  If you assign a recurring task, a copy of the task remains in your task list, but it never updates. If you check the Send me a status report when this task is complete box, you receive status reports for each completed occurrence of the task.
People can send you status updates which you can track in your Tasks view.
When you open a task you assigned, you can review the progress of assigned tasks with the % Complete box which either you or the recipient can update when they send you an assigned task status report.

Assigning tasks to multiple people

Outlook can track the progress of a task assigned to one person. If you want to multiple people to work on a task, it’s a good idea to divide the task into smaller pieces or assign each task individually. For example, to track a report to be written by three writers, create three separate tasks named Write Report: AnneWrite Report: Carlos, and Write Report: Michiyo, and assign each individual task to the appropriate writer.

Create a task

You probably keep a list of things to do on paper, in a spreadsheet, or maybe both. In Outlook, you can create tasks, get reminders, and track your progress—all in one place.
  1. Click Tasks > New Task or press Ctrl+Shift+K.
    New Task command on the ribbon
  2. In the Subject box, type a name for the task. If you’ve got a lot to enter, keep the subject short, and then add the details in the task body.
  3. If there’s a fixed start or end date, set the Start date or Due date.
  4. Set the task’s priority by using Priority.
  5. If you want a pop-up reminder, check Reminder, and set the date and time.
  6. Click Task > Save & Close.

View your tasks in Outlook for Windows

  1. On the navigation bar, click Tasks.
    Tasks command on the Navigation Bar
  2. Click a task to view it in the Reading Pane, or double-click it to open it in a new window.
    NOTE: To change how the task list looks, click Home, and then click style in the Current View group.
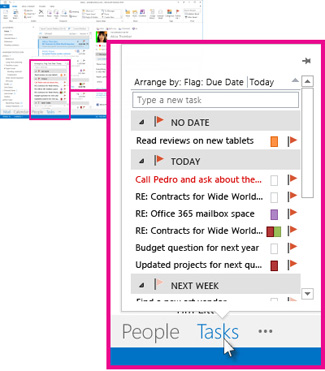
    Another way to see tasks, including flagged to-do items, is the Tasks peek.
    • Point to Tasks on the Navigation Bar.
    Tasks peek on the Navigation Bar
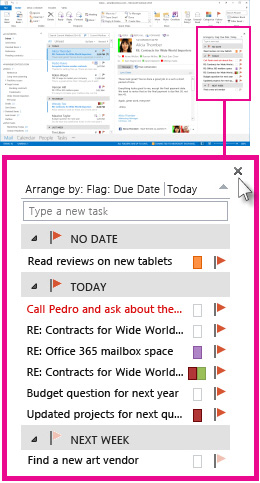
    The Tasks peek pops up. To keep the Tasks peek in view, pin it by clicking Pin button .
    Pinned Tasks peek

Mail and Calendar for Windows 10 FAQ

Check out answers to the most common questions about the Mail and Calendar apps for Windows 10 or provide feedback. To search for additional help topics, use the Search Office help box at the top left corner of your screen.
This topic was updated on August 29, 2016, based on user feedback.

Accessibility

General

  • What do I need to get started with Mail and Calendar? All you need is an email address and a password. We’ll show you how to add your account?send your first email, and create your first event..
  • What languages do the Mail and Calendar apps support? The apps support a variety of different languages. Once you change your language in Windows 10, you should see the changes in Mail and Calendar as well.
  • Where are my email messages or events? If you don’t see older emails, you might need to change your sync duration If your older events, or events far in the future, aren't visible, don't worry. The events are still there, but are outside the range that Calendar for Windows 10 displays. Learn more.
  • Why is my account out-of-date? If you’re receiving a message that your account settings are out-of-date, there are several steps you can take to fix the account.
  • How do I change or update my password? If you change your password on your email account, you’ll need to update the password? stored in the Mail and Calendar apps.
  • How can I delete or remove an account? You can delete or remove an account from either the Mail or Calendar app. You can't delete the default account, but you can turn off email for that account.
  • Can I change the color of the Mail and Calendar windows? Yes. You can change the window color, switch from light to dark theme, or add a background photo to the app. You can't add a background photo to an individual email message.Learn more.

Email

Calendar